Using Foxglove
This page will describe some of the key elements of Foxglove’s UI that you can take advantage of when visualizing robot data from ROS2 Topics. This is by no means a comprehensive overview of all of Foxglove’s features, but it should serve a general overview of the most important visualization tools Foxglove offers. If you haven’t already, it is strongly recommended that you read through the Foxglove Setup documentation so that you have Foxglove properly set up and are ready to continue with this tutorial.
UI Overview
As stated in the previous section, launch your ROS2 package and open Foxglove (either through the application or the website) if it is not already open. Upon opening, you may be greeted by a login screen. If this is the case, go ahead and log in with the account you made in the last section. You will then be brought to the Dashboard, which should look something like this:
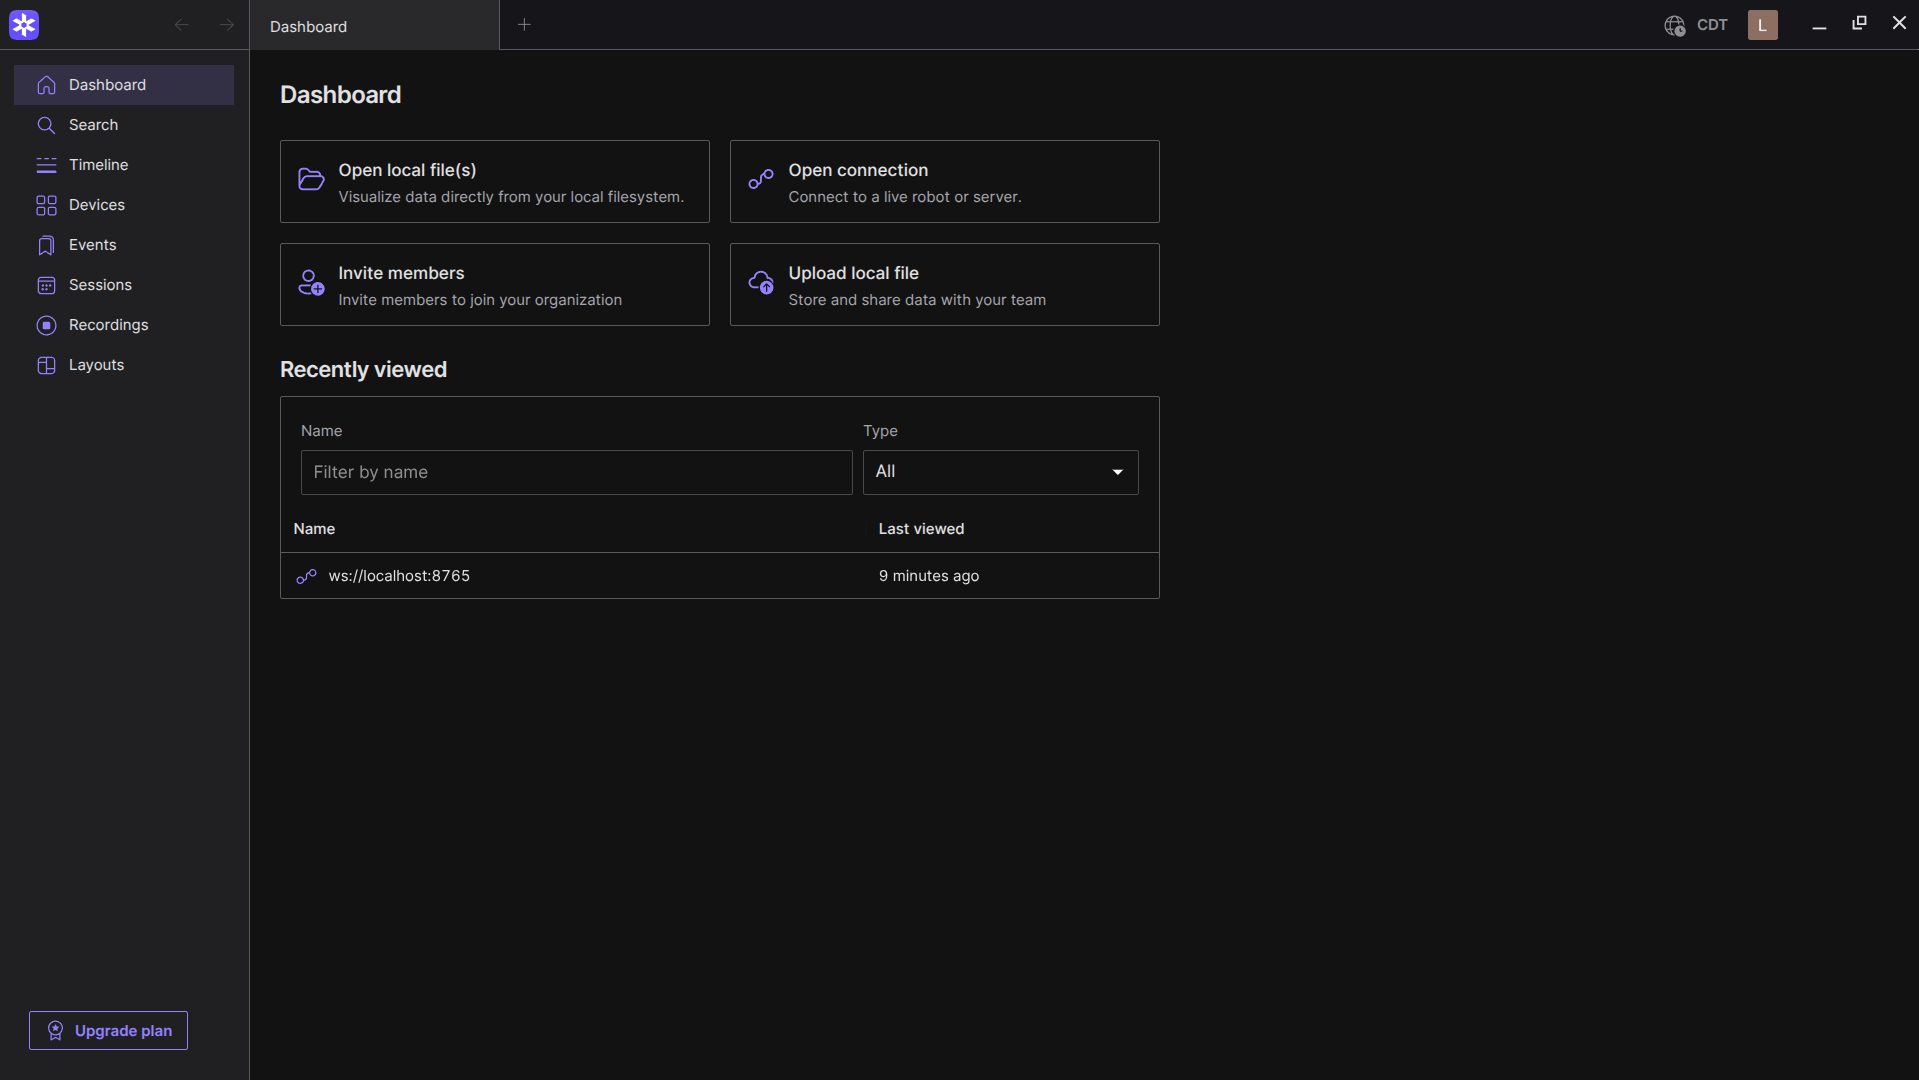
Click on the box labeled “Open Connection”:
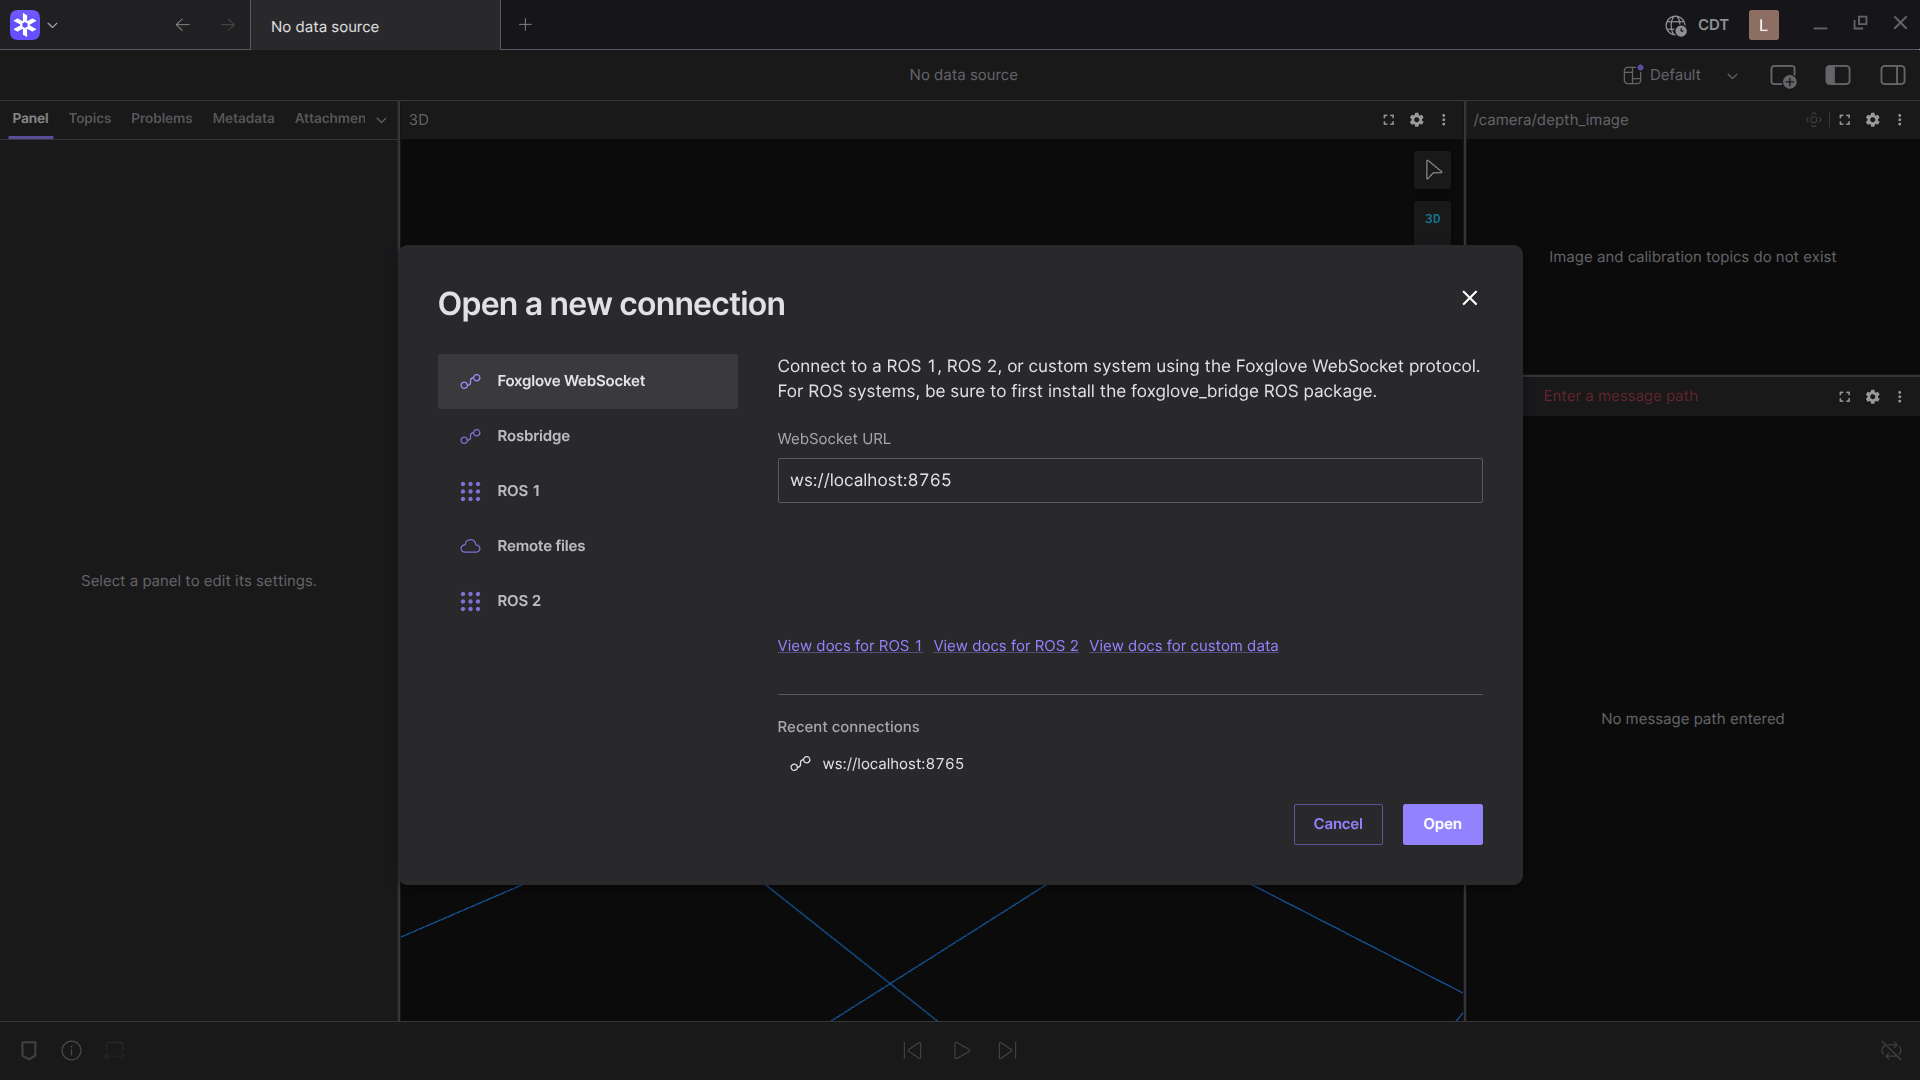
Make sure “Foxglove Websocket” is selected, and the localhost port is the same as the one your bridge node is using (the default should be fine if you didn’t change it.). Once you verify the localhost URL is correct, click “Open”.
Depending on your active topics or if you have used Foxglove in the past, your screen may look a little different from this, but the layout should be relatively the same.
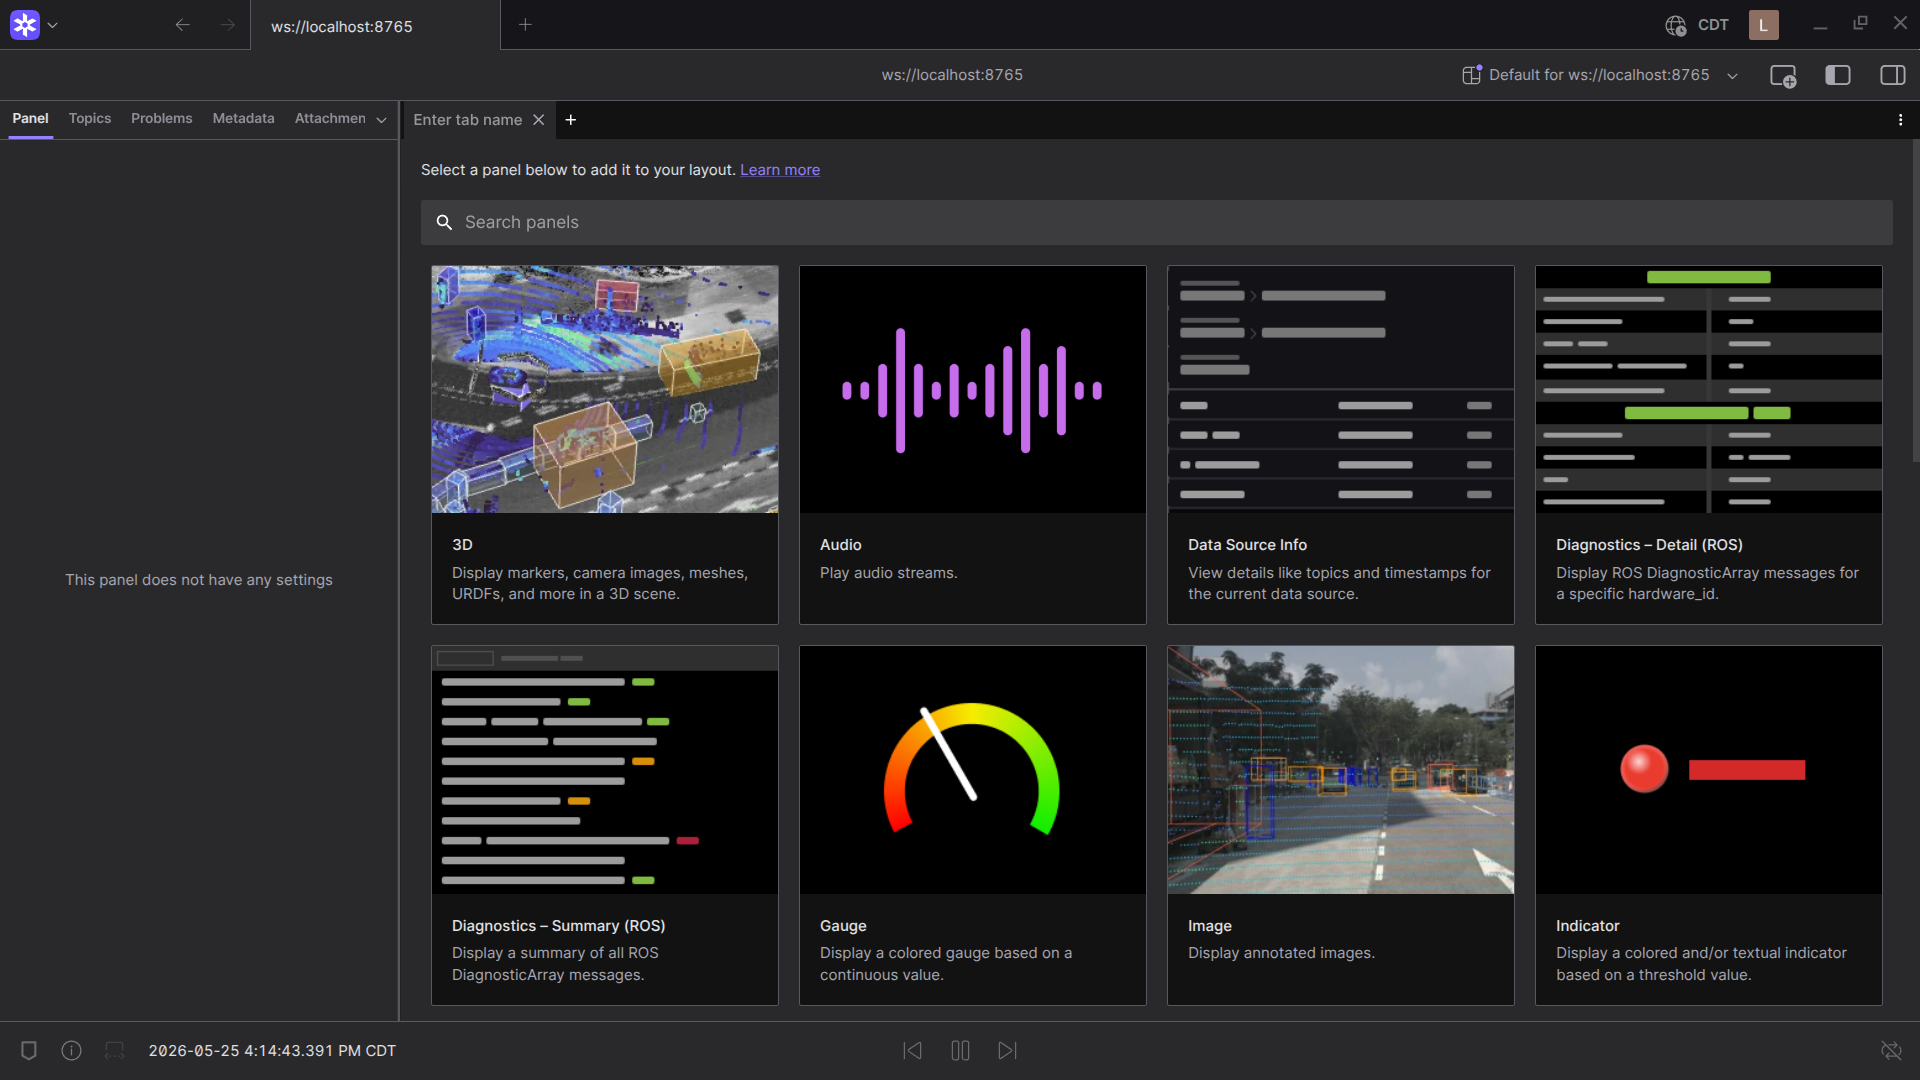
Panels
Foxglove contains dozens of different panels that can be used to visualize different types of data received by your ROS2 topics. For the sake of this tutorial, we will only be looking at a few of these panels. To start, click on the “3D” Panel.
The 3D panel is very similar to the robot visualization you will see if you run Rviz. It serves as a way for you to visualize what your robot can see/understand about the world around it. If you click on the 3d panel, you should see a list of options appear in the menu on the left side of the screen. Here, you can configure things like what topics are visualized and how those topics are visualized. I strongly recommend experimenting with the different options available here to see what they all do, but for the sake of this tutorial, you can scroll down to the “Topics” section in the panel settings to see a list of all the topics Foxglove can see. You can then click on the little eyeball icon to the right of each topic to toggle it’s visibility.
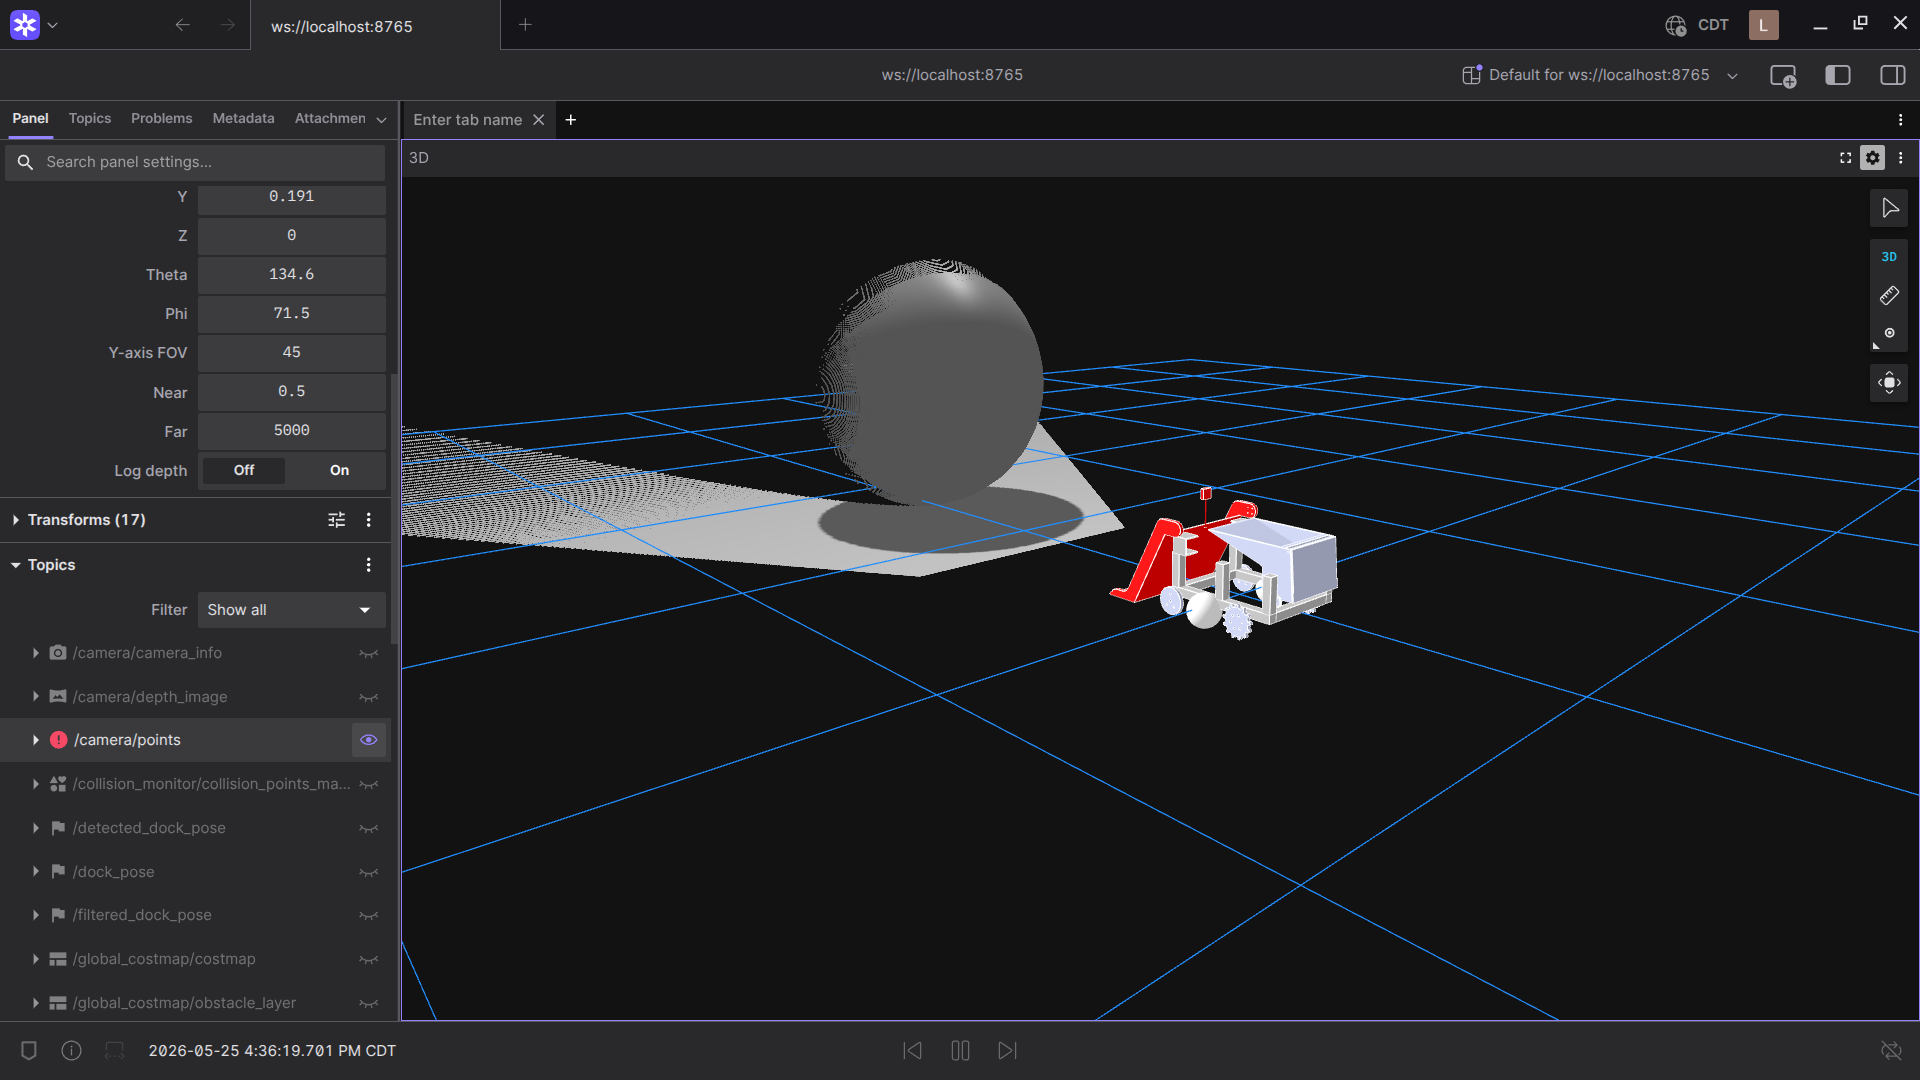
The Foxglove UI is highly customizable, allowing you to pick and choose which panels you have open at any given time. For example, if I want to view the depth camera image alongside the 3D model I currently have visible, I can do so by clicking on the “Add panel” button in the top right corner, and select the “Image” panel.
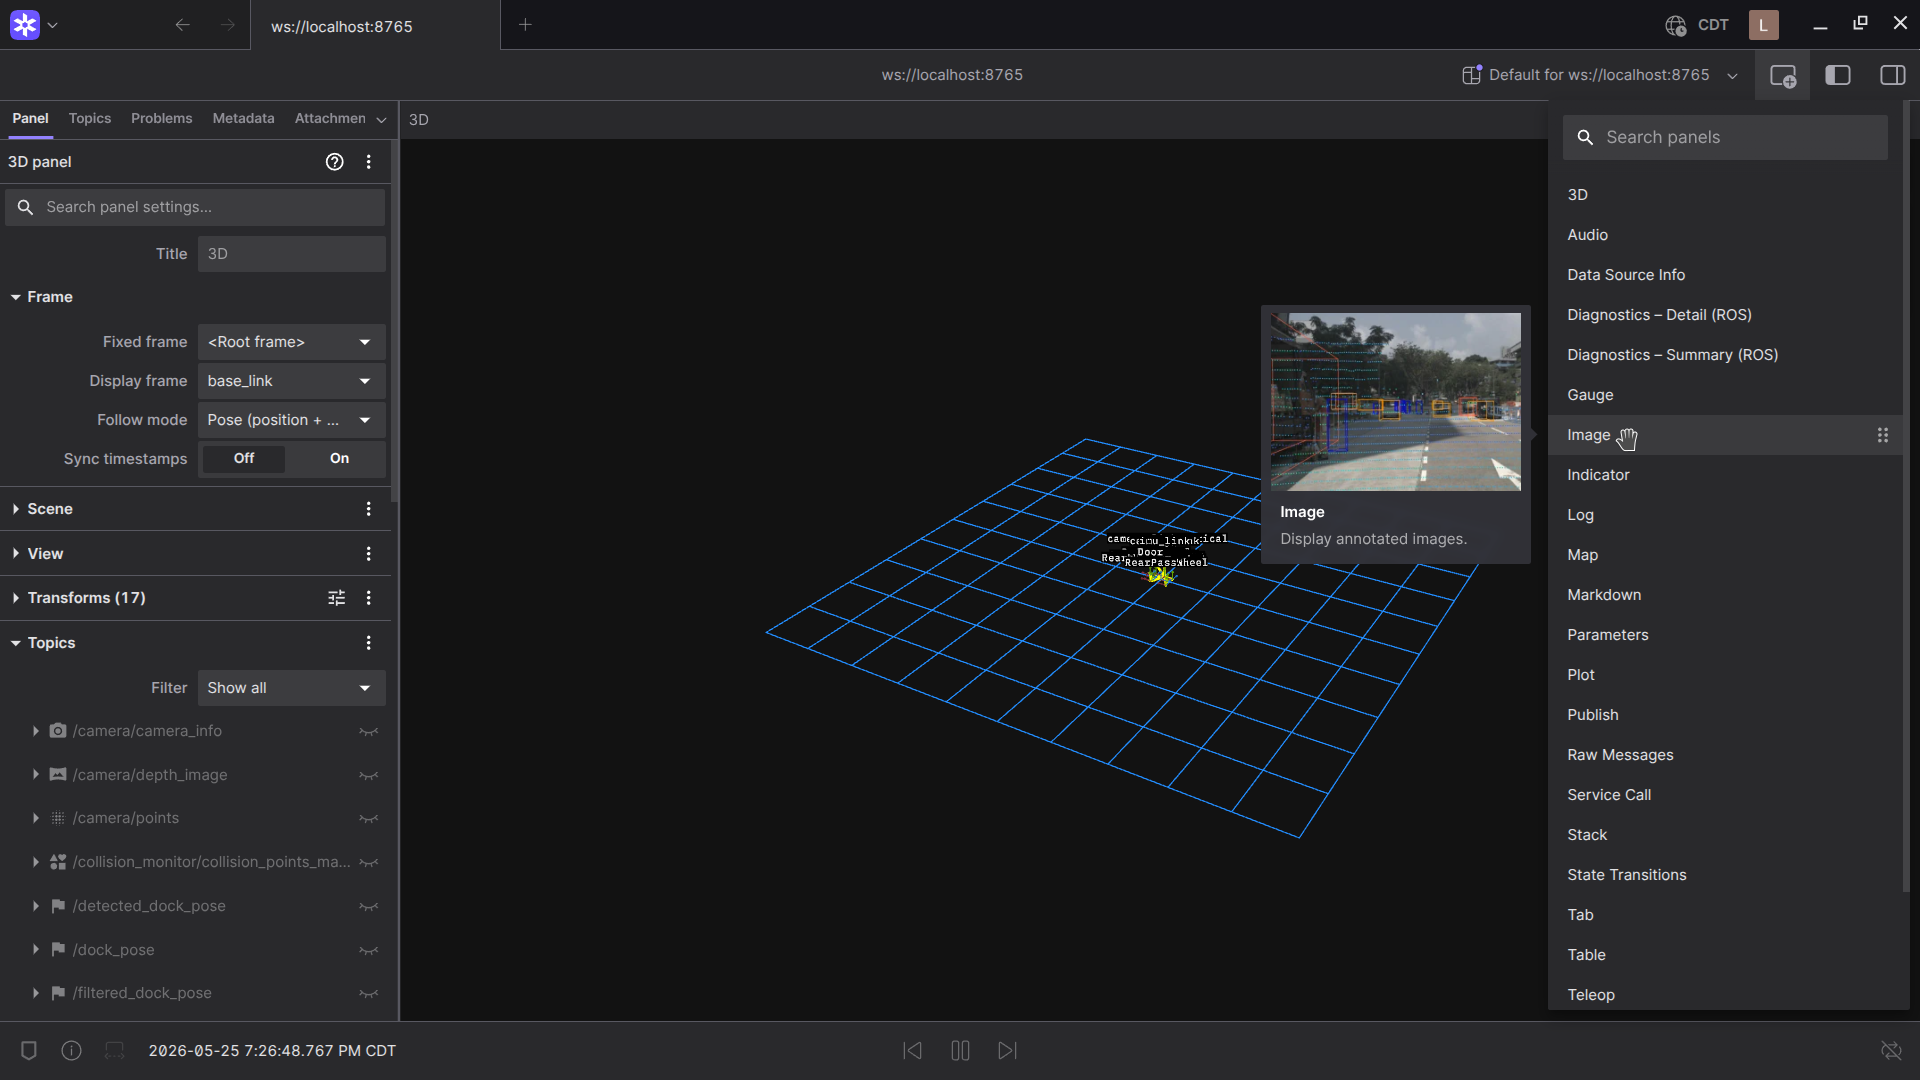
I can then click on the image panel and configure its settings just as I did for the 3D panel. In this case, the most important setting to look at is what topic the Image panel is displaying. This can be found under the “General” tab in the panel settings.
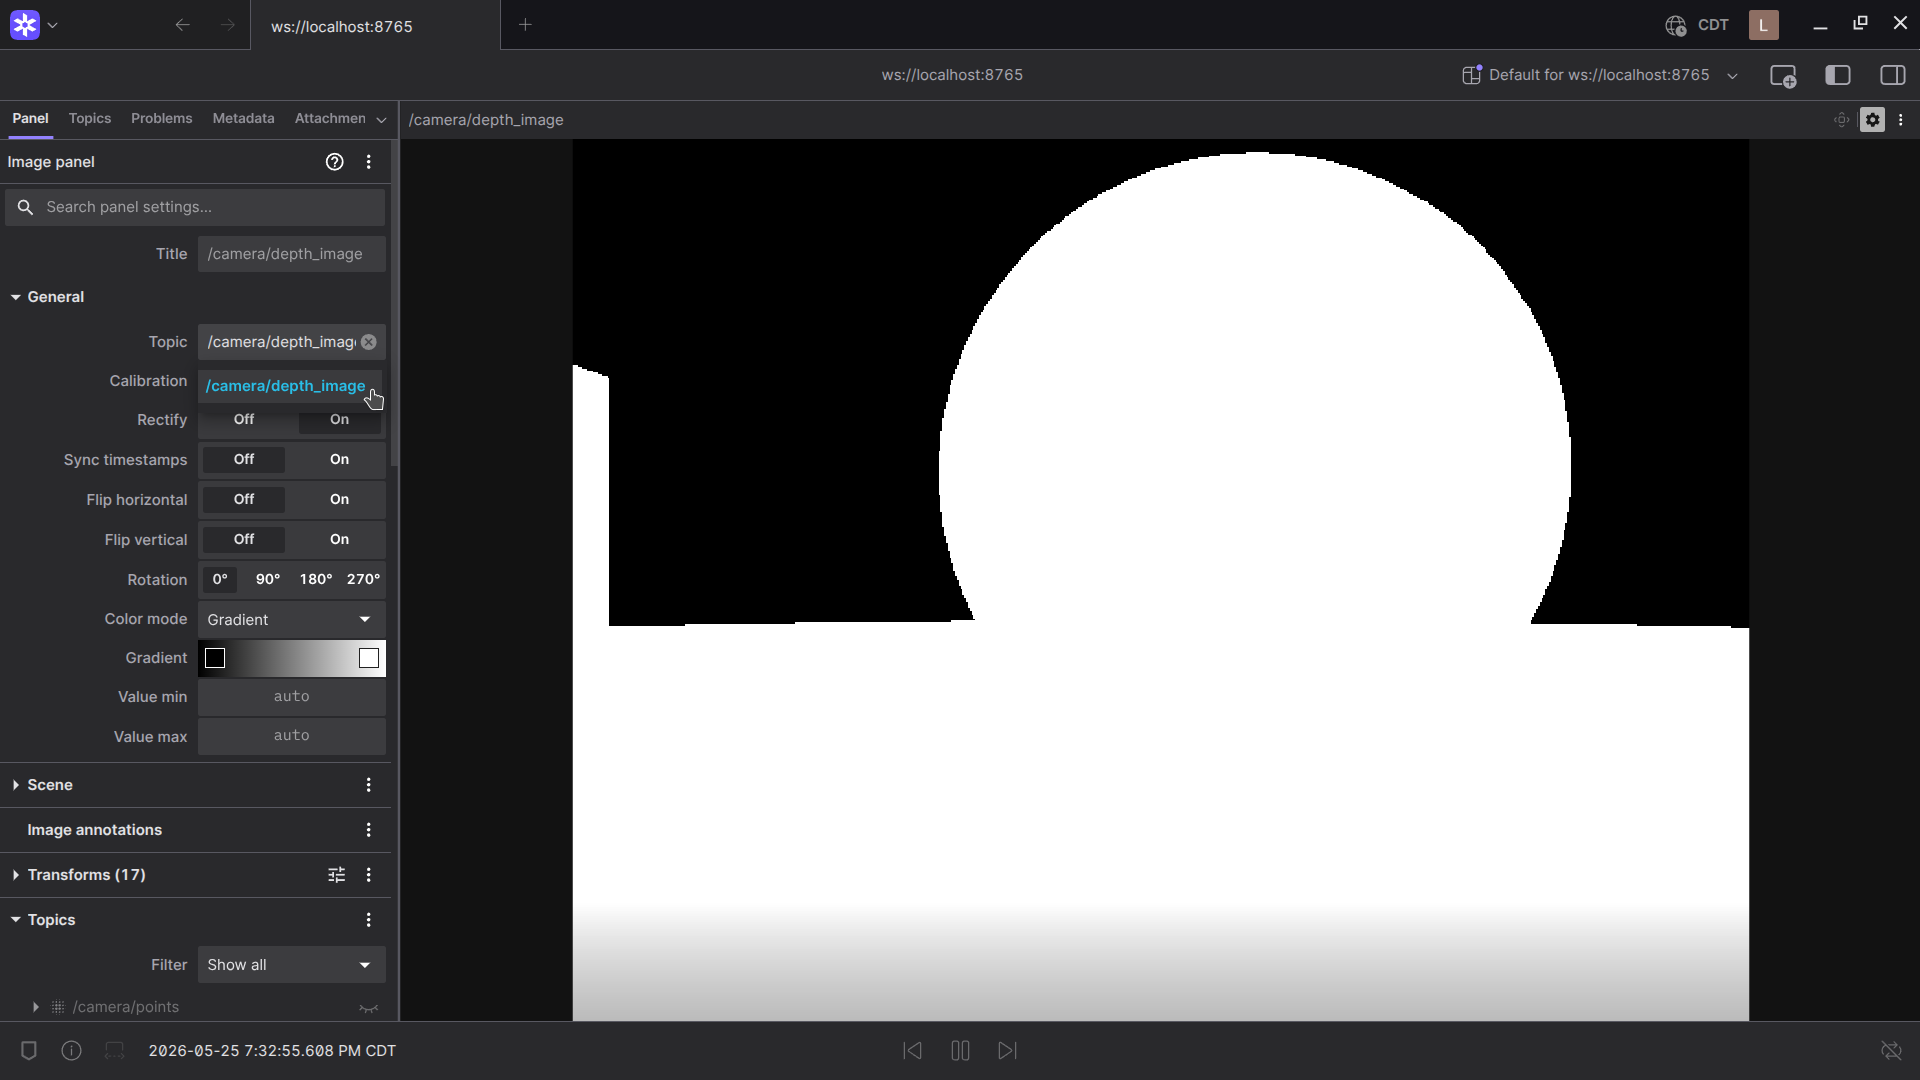
Important Note: Not all of the settings will affect every panel. For example, toggling the visibility of the /robot_description topic will not affect anything in the Image panel. Only settings pertaining to what each panel shows will affect that panel.
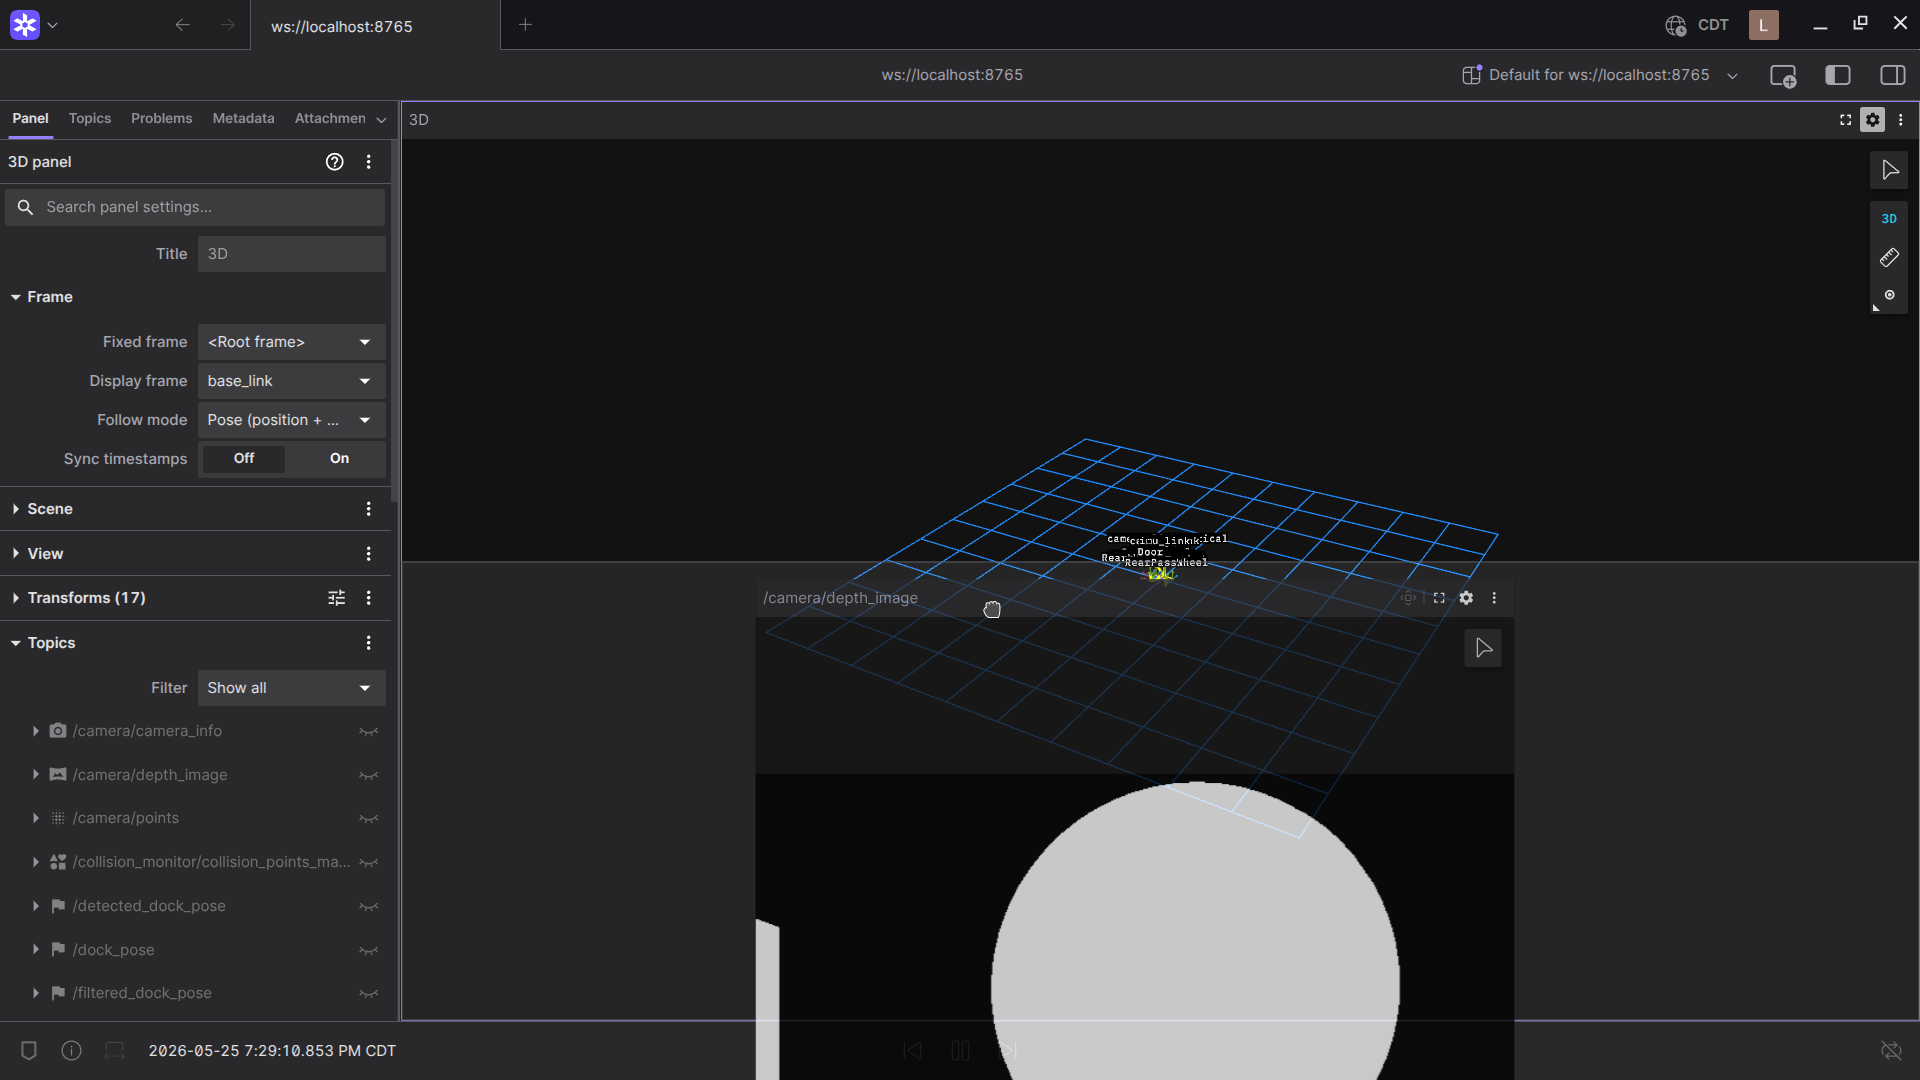
All of the panels in foxglove are modular, so you can move them around the window however you like by simply clicking and dragging the panel to the location you want it to go, similar to how you might move panels around in VSCode. This allows you to customize the layout of the panels however you want.
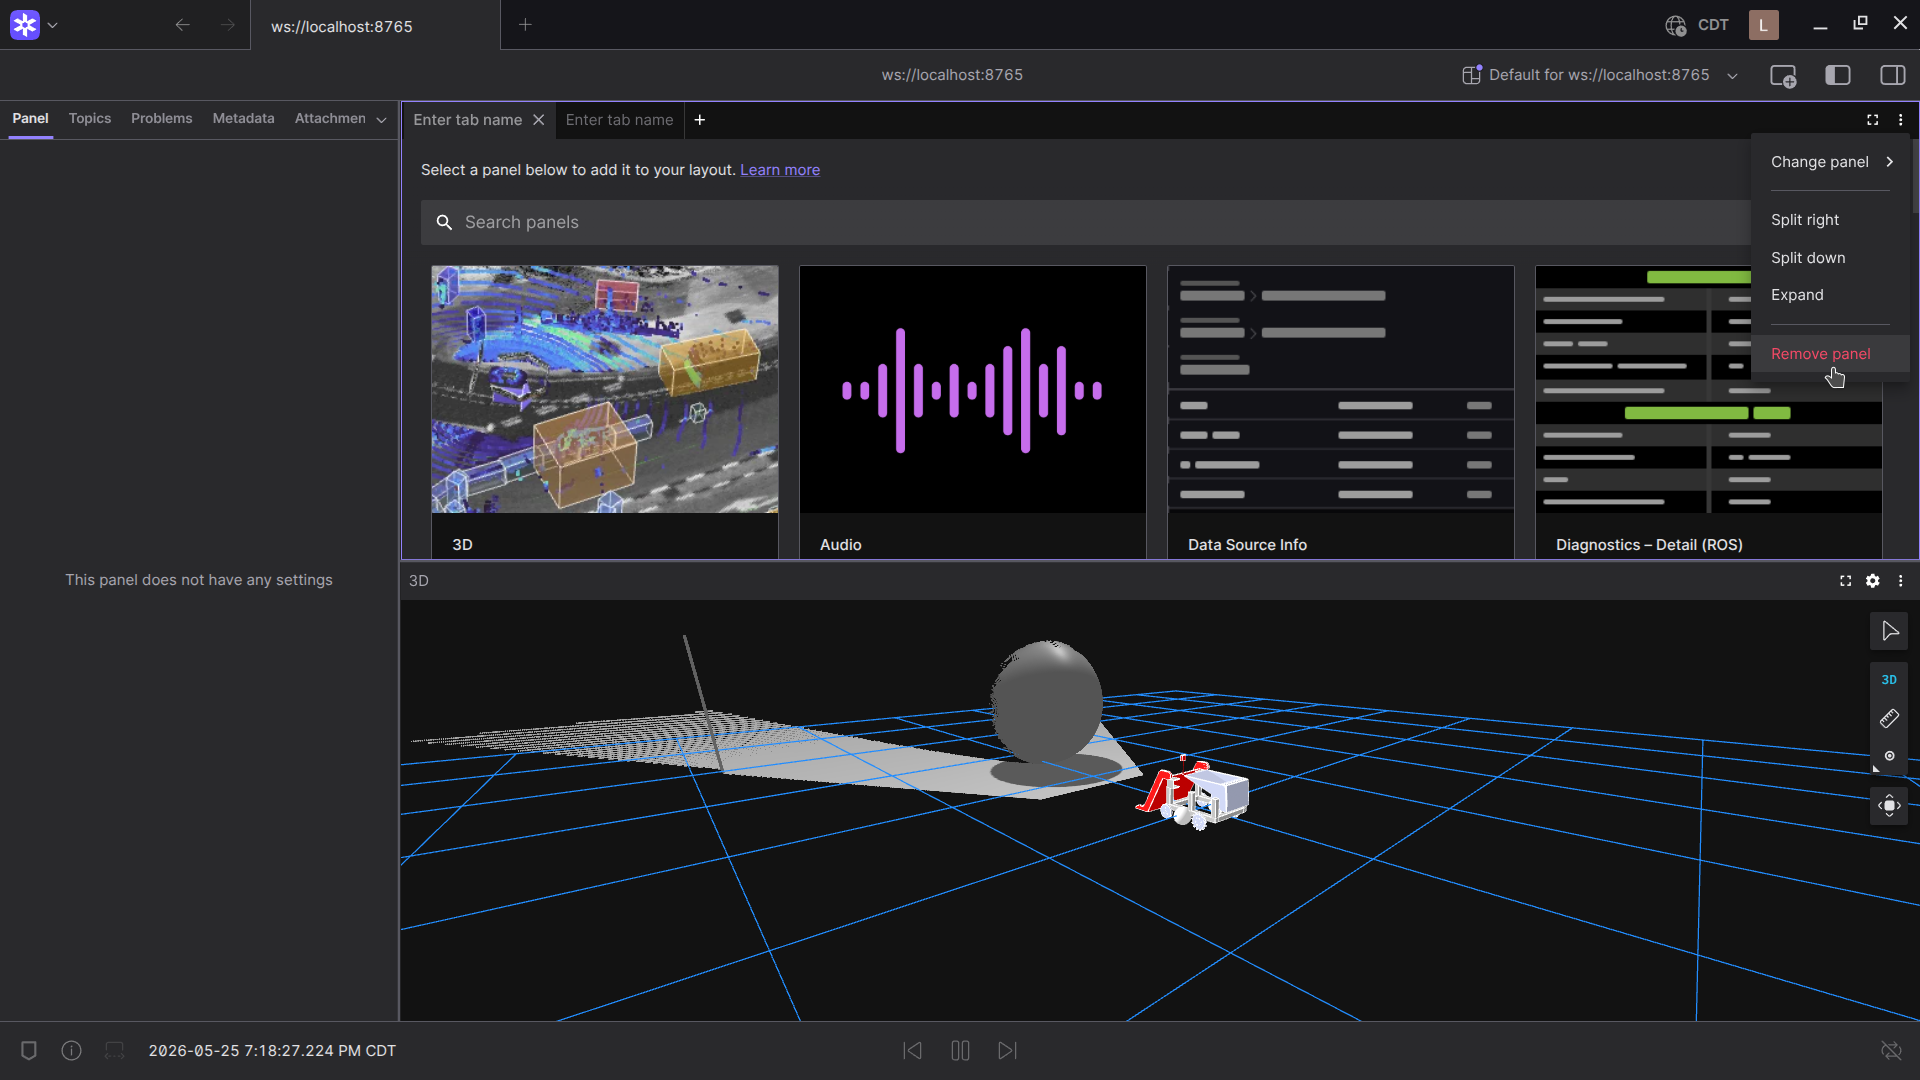
If you want to close one of the panels you have pulled up, you can simply do so by clicking on the vertical line of three dots in the top right corner of a panel and selecting “Remove panel”.
Import/Export Layouts
Now lets say you have a panel layout you like and want to save it for later use. You can do this by saving the layout configuration, and even downloading it as a JSON file for use on other systems. To do this, click on the dropdown menu in the top right corner of the screen and select “Manage layouts”.
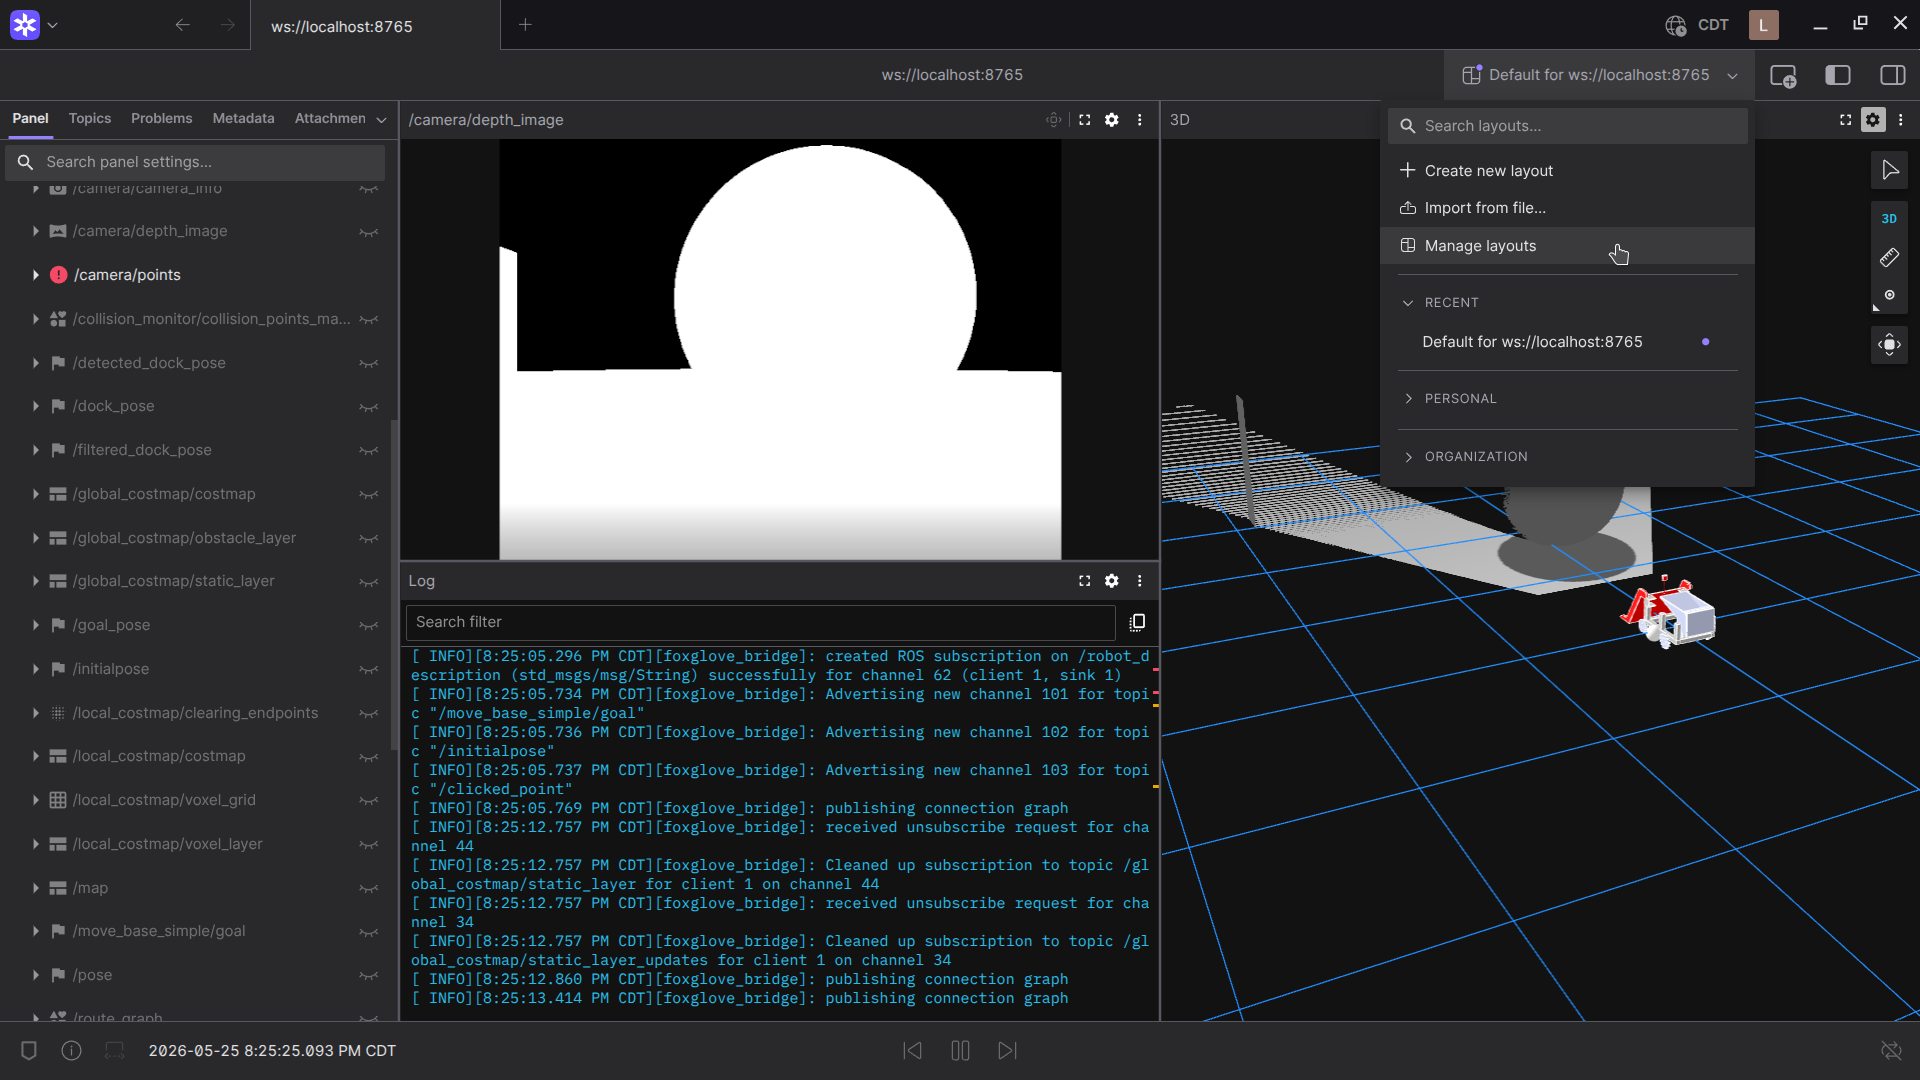
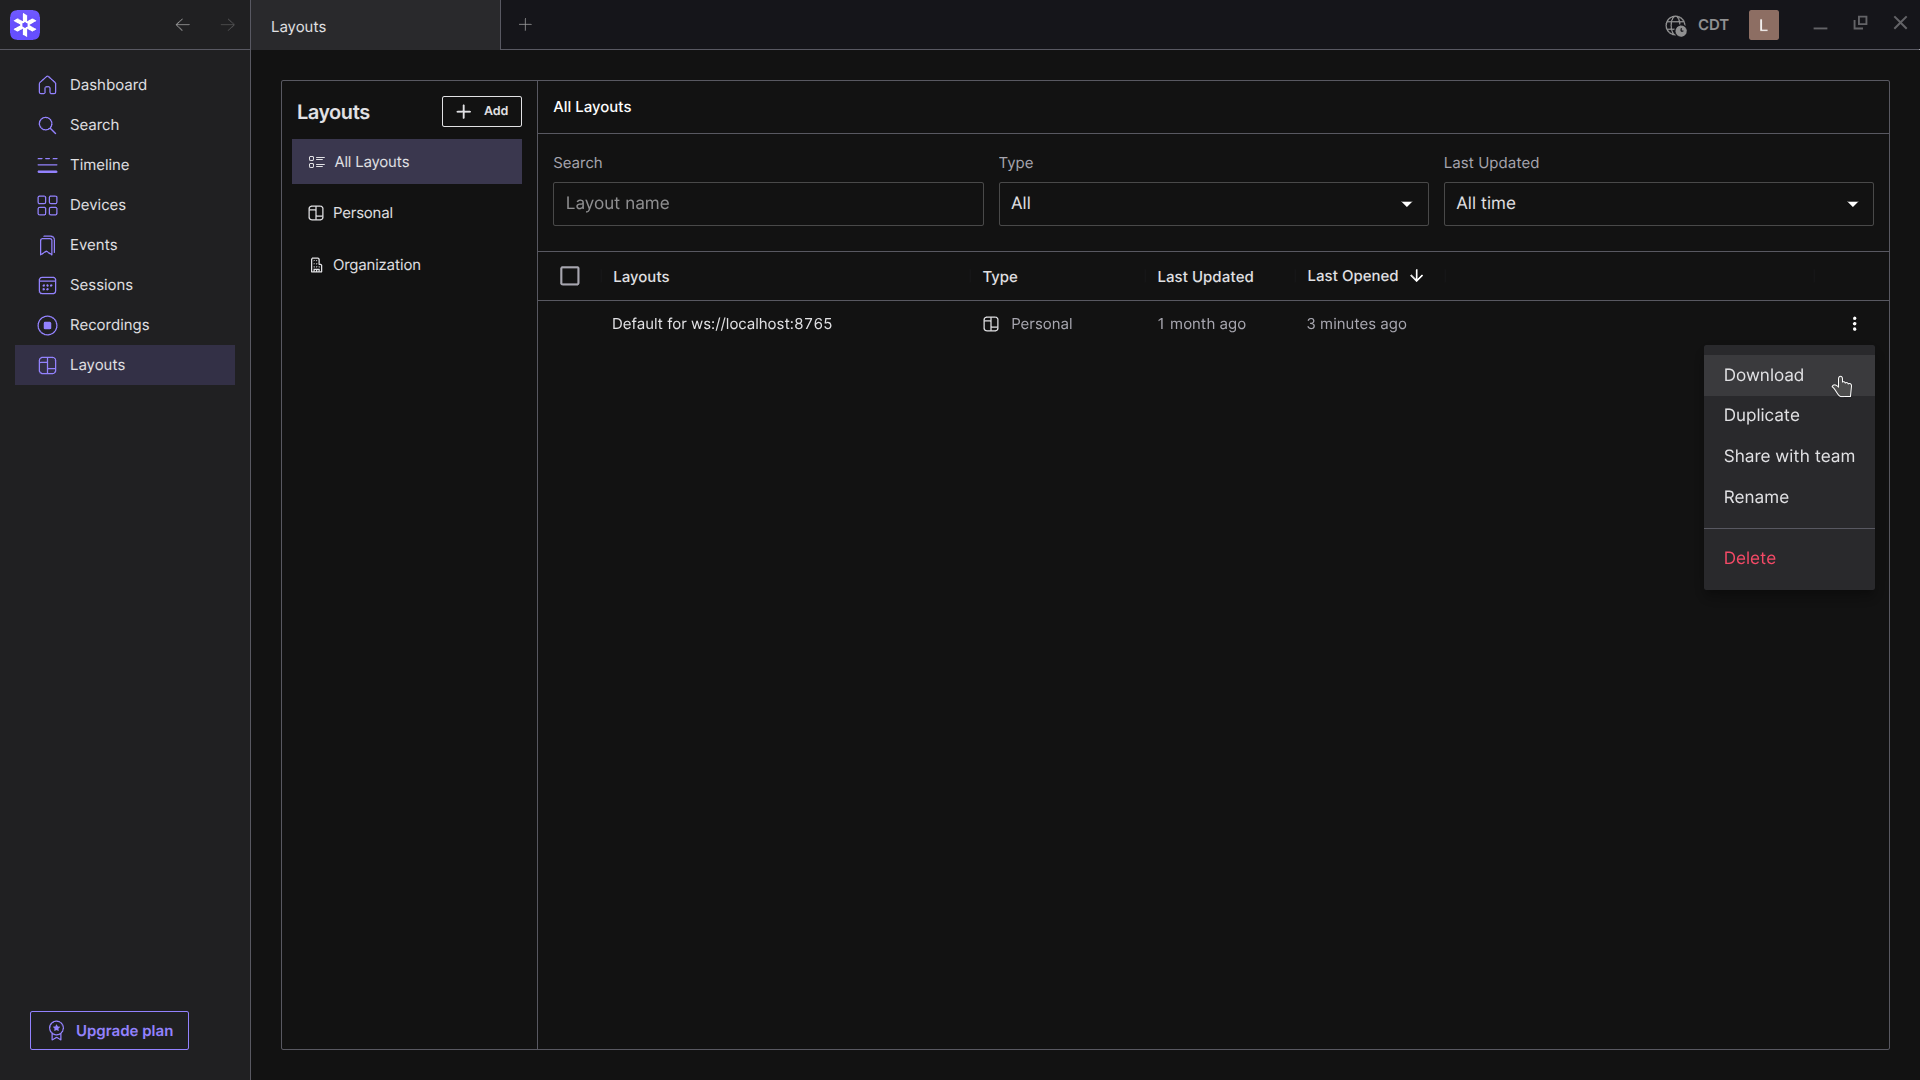
This should bring you to the layout manager. Here you can configure layouts for yourself and your organization. To configure a particular layout, click on the vertical line of 3 dots to the far right of the layout you want to modify. For this tutorial, we are simply going to download the layout so we can import it in the future. To do so, click the “Download” button in the menu, and save the resulting JSON file to your PC wherever you like.
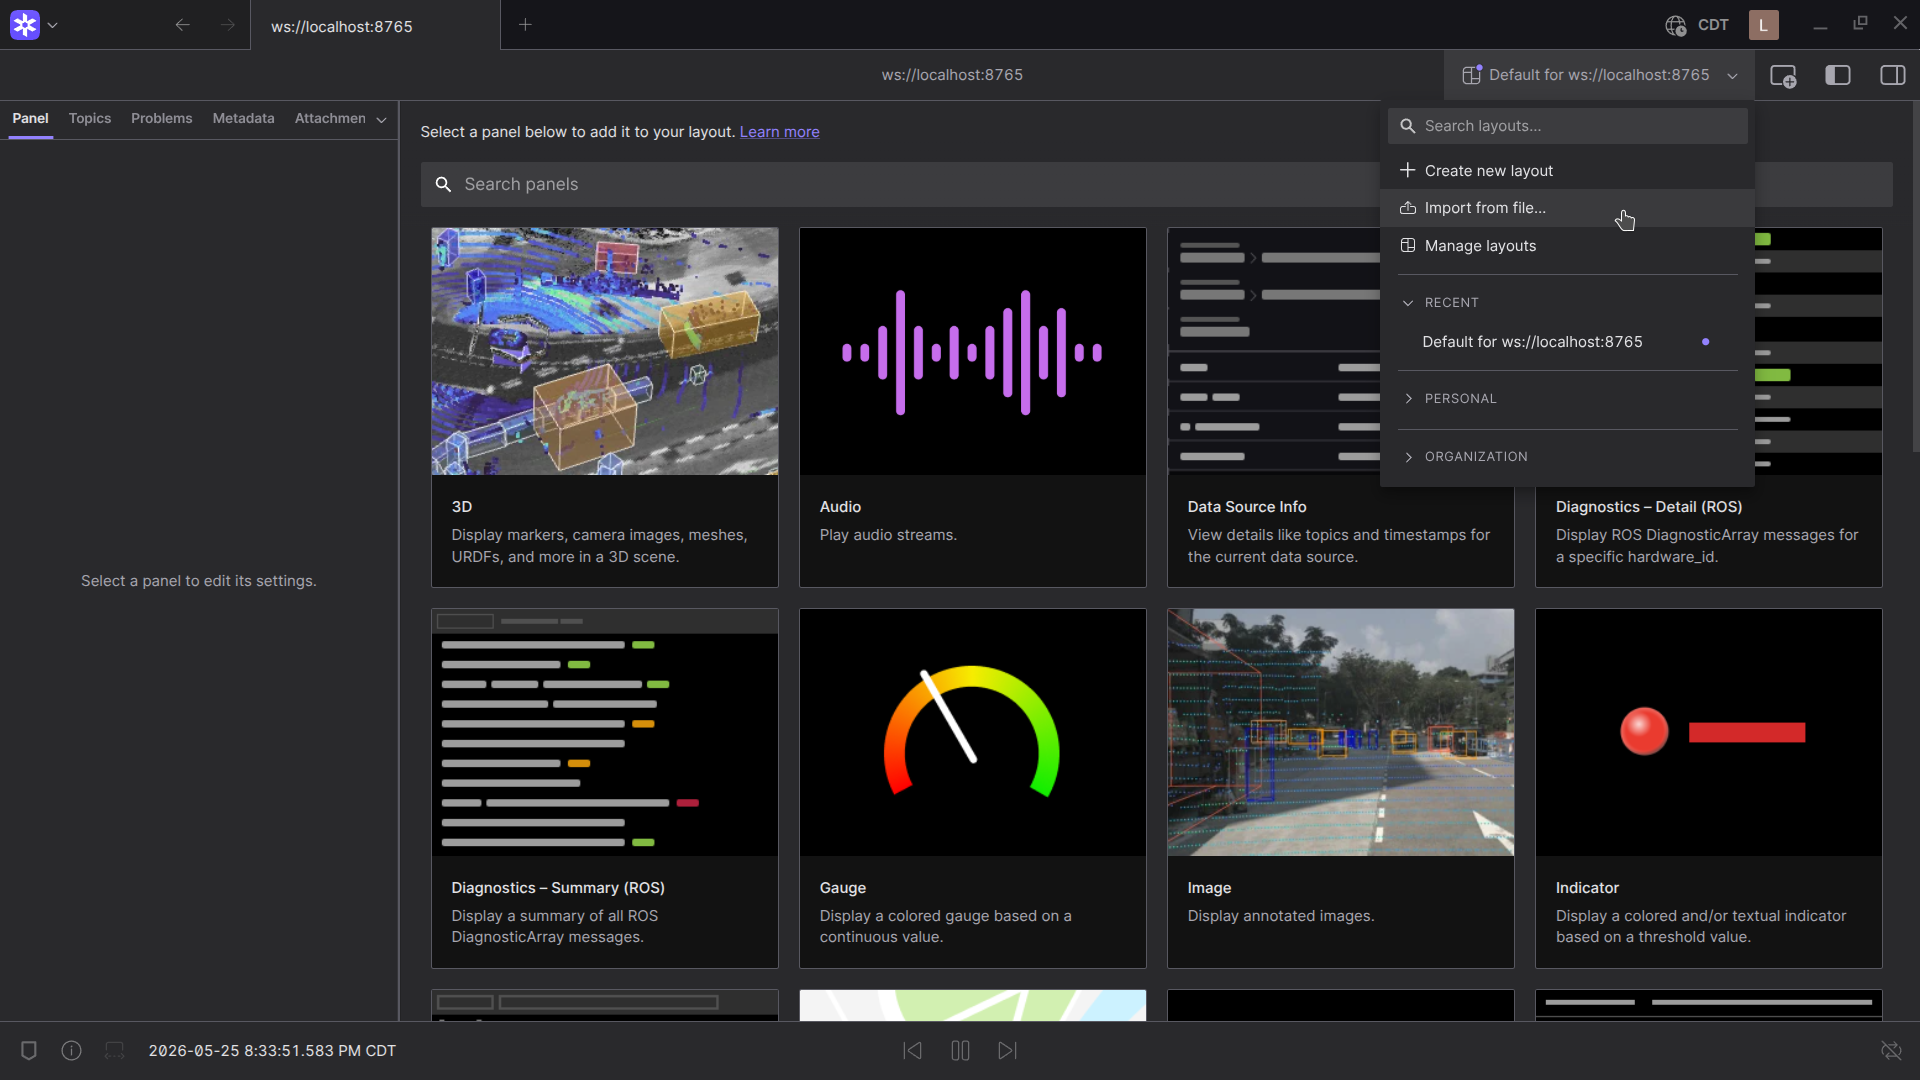
Later, if you want to import the layout you saved, you can do so from the main panels screen, by clicking the “Import from file” button in the same dropdown menu you used to access the layout manager. You can then simply select the JSON file you previously saved, and it will load the corresponding layout.
This concludes our basic overview of how to navigate and utilize Foxglove. It is important to mention once again that this is nowhere near everything Foxglove is capable of visualizing, as there are dozens of panels available for both sending and receiving data from your robot. For a much more detailed overview of each available panel in Foxglove and how they work, I recommend looking at the official documentation.
Author: Jesse Mills (https://github.com/JesseMills0)